The simple procedures for connecting LED strip lights without пайка are listed нижче.
Вирізати смужки до розмір після вимірювання їх.
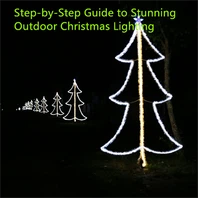
The підготовка of the LED strip lights for installation is the first stage. Wherever you intend to place them, measure the area with a tape measure. Discover some of the ideal locations to put LED strip lighting in this article. If you want to put lights around a mirror, for instance, measure its length and width first. For example, a mirror may be 40 cm wide and long.
Calculate the area's perimeter where the lights will be installed. Hen calculating the the area of a form with four sides, add the lengths of the sides together. For the mirror indicated before, for instance, the total would be 100 cm plus 100 cm 40 cm plus 40 cm=280} cm. This perimeter calculator might be of use to you.
Одного разу ви маєте форма's perimeter, check to make sure your LED strip lights are long enough. In case a error is made, it is advisable to buy strip lights a few сантиметрів longer than you need.
Тепер це ваш світлодіод смуга ліхтарі є набір up, ви можете міра довжини оф смуги ви'll потреба і позначка точка де ви'll потреба до вирізати їх довідки.
Є є крапки на смуга вогні що вказувати те розташування з мідь порції де ви можете вирізати їх. Коли ви є зменшуємо розмір з вогні, cut to the найближчі крапка. To cut the lights, just use a pair of ручні ножиці.
Визначте з'єднання ви вимагати.
You must now choose the sort of connector your lights require. Jumper cord connections and gapless pin connectors are the two primary categories. Gapless connections produce a gapless line of LED lights. Jumper cord connectors, on the other hand, contain a tiny space between the wires, which makes it it easder to position lights at angles, such as around kitchen surfaces.
A 90-}degree connection or a straight connector may be required, depending on where you plan to install the lights.
Підготуйте ваш з'єднання.
Prepare the connection you'll be utilizing. Peel off the self-lecesive tape that is usually used by these connections as need.
Make sure the connection is facing the right way around before attaching ach end of the strip. normal polarities are used by LED lights. Put the strips of the strip lights together right away using the clamps that are selled to the strip.
LED смуга ліхтарі that plug in
The LED смуга ліхтарі need to be plugged in as the last step. Make that the strip lights are lighting up as as you would expect. Check to see wheer you have the polarities in the right order if they don't light up. Now that your strip lights are installed, enjoy them!
Купівля преміум світлодіод ліхтарі від світло постачальник праворуч геть!
Як до приєднання світлодіод освітлення без використання a підключення
The LED strips may be soldered together if you don't want to utilize a connection. Find out below how to achieve this.
Locate a spot to solder that is secure and sanitary.
Finding a clean, safe location to solder the metal is the first step. To guarantee airflow in and out of the room, the location should be next to a window. You may also utilize a room fan to increase vent.
All of your tools should be set out at this point, and you should put on the proper PPE (clean gloves and eye protection). In addition, you should tie up your long hair as an add measure of protection.
Зазвичай, it takes a пайка залізо 30 до 40 секунд до нагрівання вгору.
Підготовлений дроти
Each wire's end has to be soldered during the setup phase. Alough it shouldn't be particularly obvious, this will greatly simplify the пайка процес.
Паяти
The major work, пайка, may now begin. Each of the wire's dots—which mimic the copper sections—should be soldered. Avoid over-explaining each point.
Тепер це дроти і крапки є підготовлені. So, align each wire with the appropriate dot and solder them together to form an attachment. Before adding the next wire and dot, allow the solder to fully solidify. Continue until the task is finished!